I have tried to get decent pictures that can be blown up for clarification, the result is that it takes forever for this page to load.
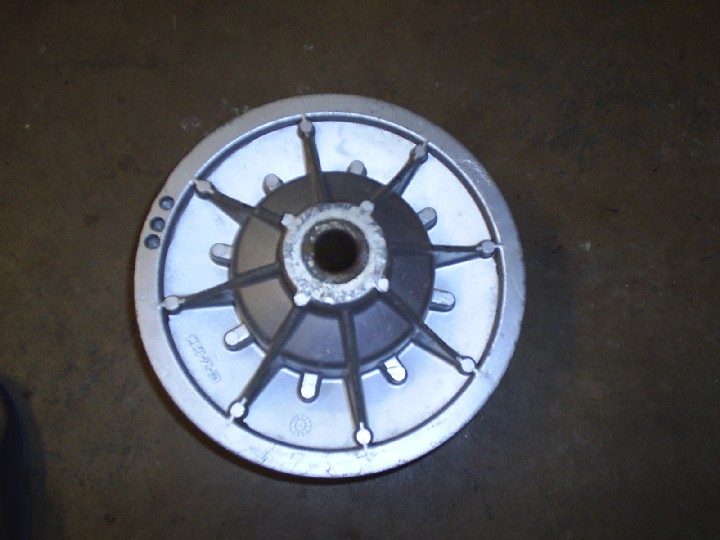
The first step is to remove the clutch from the cart by removing the bolt in the center and sliding the clutch off. You will then need to remove the snap ring that is found on the back side of the clutch. This can be a bit dangerous. The snap ring holds a spring compressed, and if the ring is removed with nothing to hold back the spring may throw parts at you (this is the dangerous part).
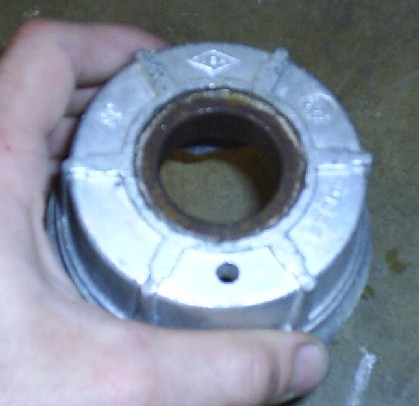
I would suggest securing a rope or something similar through the hole and tie it in a loop. This should make the procedure safer by preventing the "cover" from flying at you.

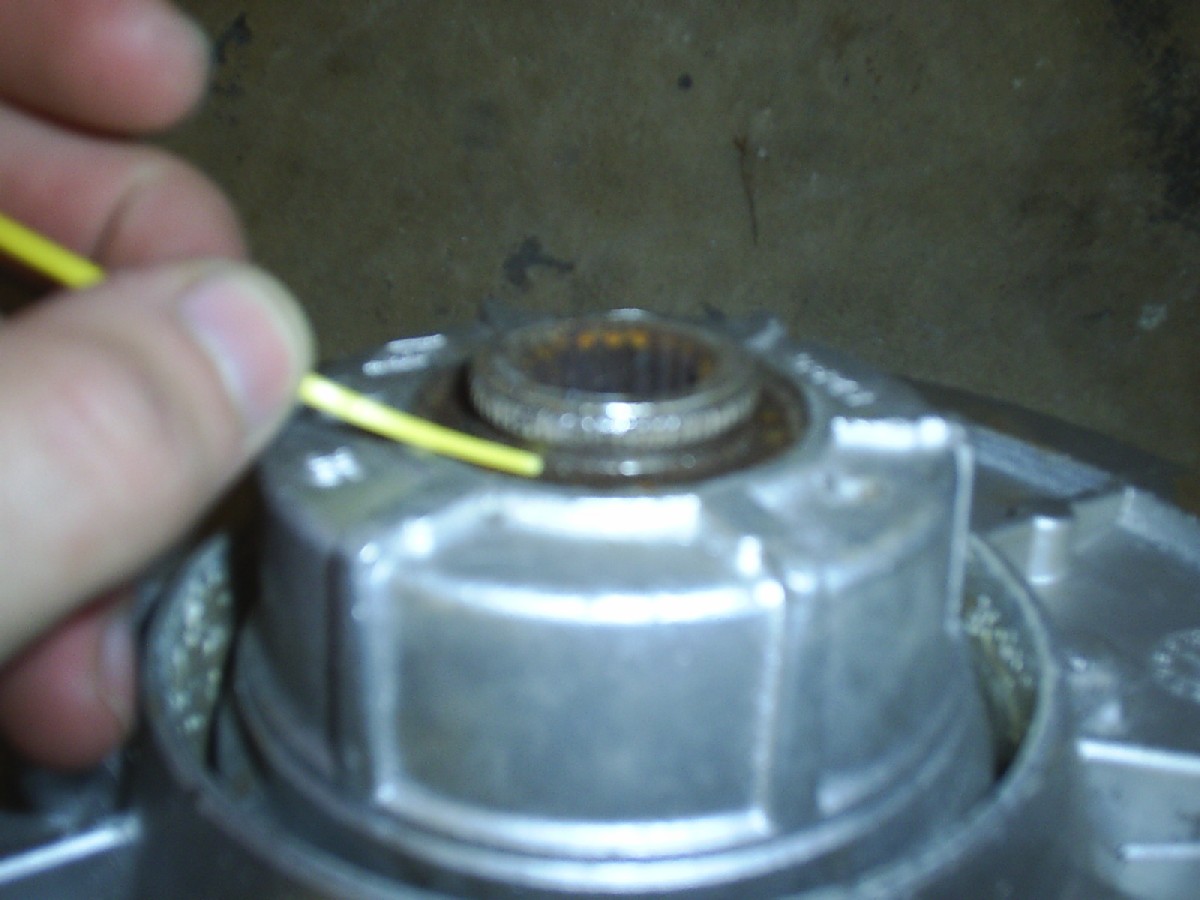
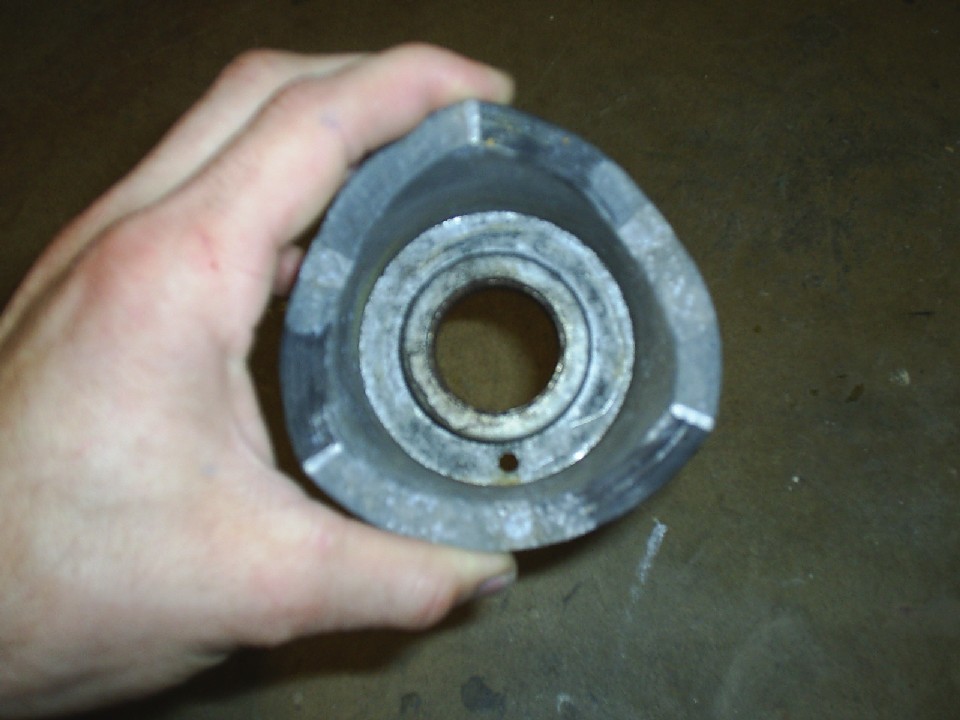
Next, push the cover down a bit, 1/8 inch is sufficient, just a bit will do. What you want to do is get the spring tension off of the snap ring so that you can remove it easier. In the picture the snap ring is already removed, and the yellow pointer is showing how far past the snap ring groove the cover can be pushed down without damaging the splines.
I have used a vise to accomplish this, but it can be done by hand if you have a friend to help.
NOTE: the only reason i am able to get this pic without holding the cover down with a vise is because the spring has been removed.
UPDATE: This step is also important because it will break loose seized splines, thus making the removal of the cover much easier. Also, hammers will break the aluminum, try to avoid using them here.
Once the tension is off of the snap ring, you can remove it like normal.
After the snap ring is removed slowly back the vise off, or let the cover come up on its own. The spring tension should push the cover off if the splines are clean. I have seen the splines be a bit contrary and the cover not come off after the snap ring was removed. This is a pain, but some wd-40 to the splines will help. If it is still stuck make sure you have pushed it in just a little bit to break the spline loose, and hopefully it will come off. The only time none of the above didnt work I lost my patience and threw the clutch down in the front yard, where it came right apart. Had to clean the grass off of it, but no damage done.
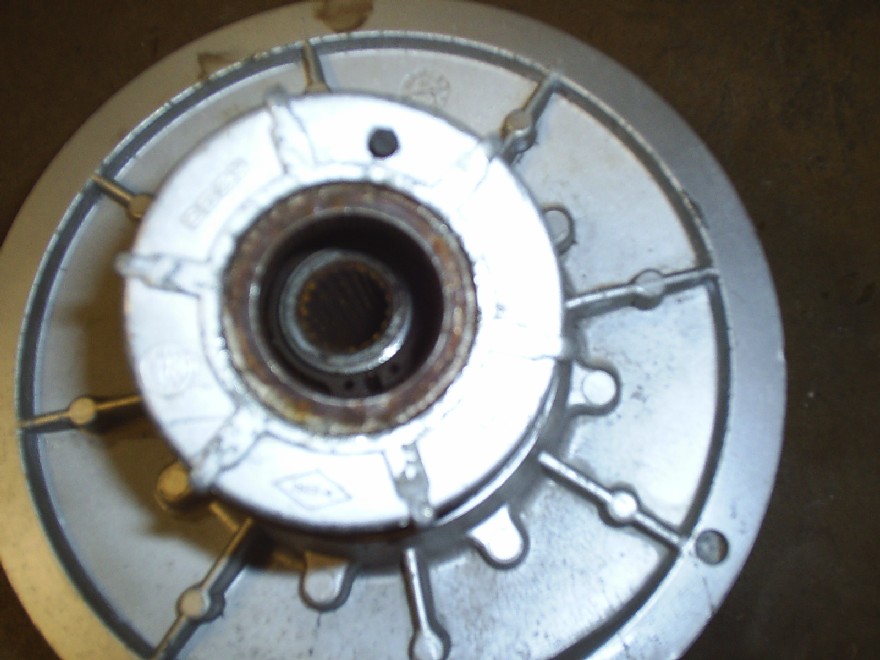
Once you get the cover off the first hurdle is over. This is what you should see inside. There are 3 "pad" looking things inside the clutch. In this picture they look like rusty parts. They are called ramp pads. These things cost 2.25 each and are the primary cause of clutch failure. You may have so spend 150.00 on a new clutch because 7.00 worth of pads wore out and ruined the ramps. I would suggest replacing these when you convert your clutch.
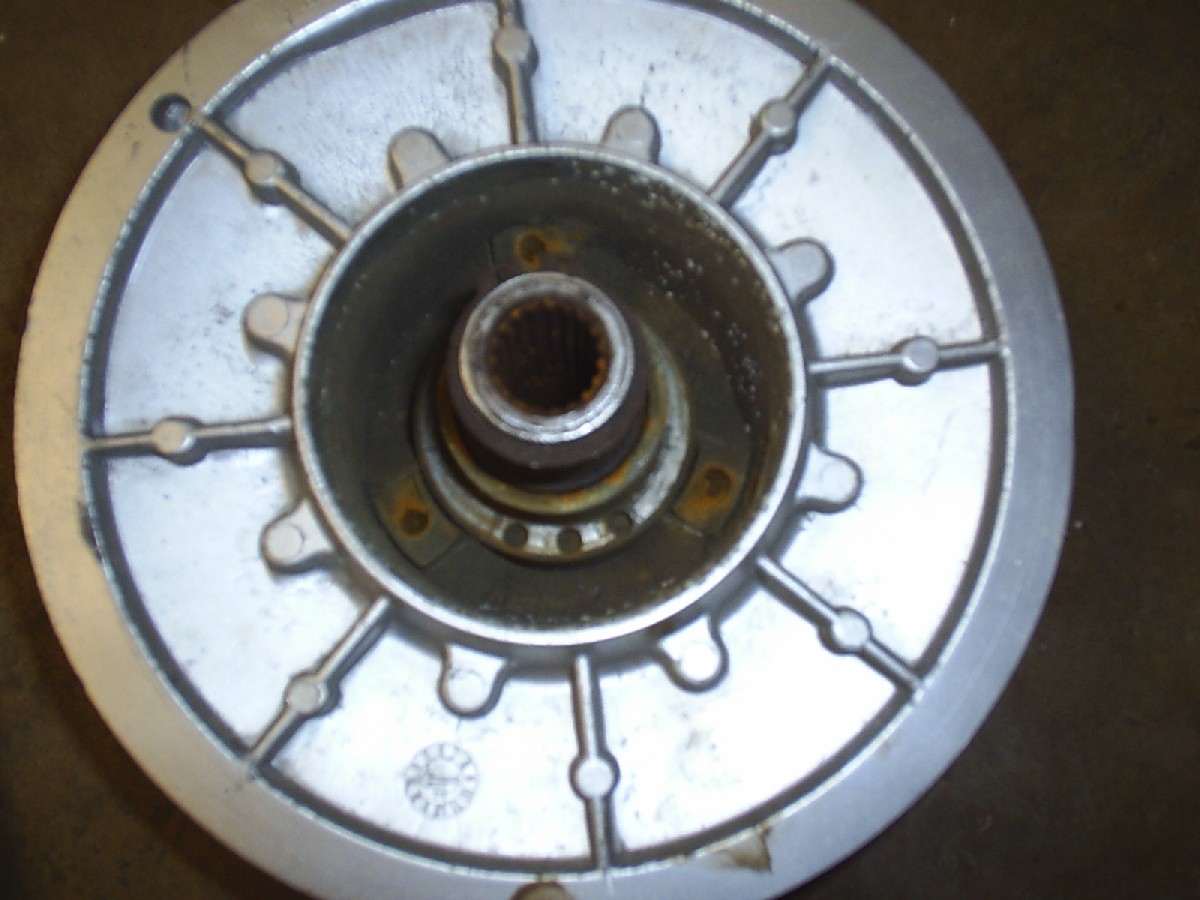
If you are like me and want to know that all is well and that reliability is going to be good before putting this back on the cart I would also suggest looking at the ramps. These are the parts on the cover that come in contact with the ramp pads. You want to see if the pads have worn through and began scoring the ramps yet. If there is scoring dont worry, I have seen several that were scored a bit but still usable. It seems almost impossible to get a good pic of this, but these ramps are scored pretty bad even though you cant see it in the pic. If you look at the ramp from the side and it still has a triangle shape, and not big dips in it it should function reasonably well.
Now for the how to convert it part. You should have ordered a spring that looks like this. I will put the part number in here somewhere, someone please email me if i forget. This spring is different in one obvious way, It has "prongs" on the ends instead of being flat. That is because this spring serves 2 functions instead of only one. It both pushes the sheave together and provides torsion against the clutch's desire to "upshift" This torsion makes all the difference in the world.
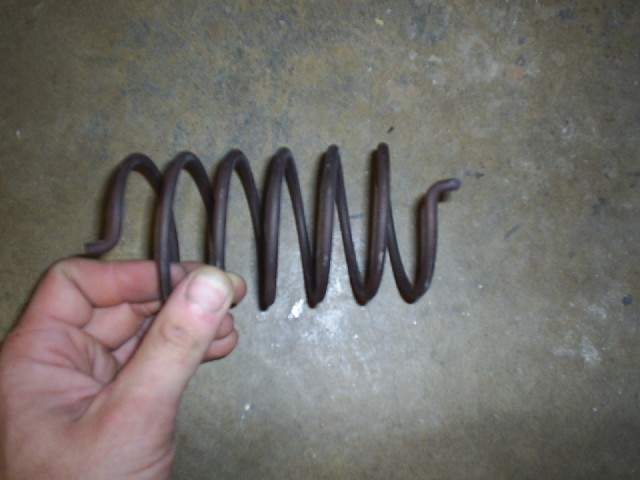
To insert the spring, place one prong into one of the 3 holes in the main body. 1 for less torque, 3 for the most. Stock is 2 on the industrial clutch I took apart and it seems to work well for my cart. If you want to tune if later it isnt such a big deal to move it.
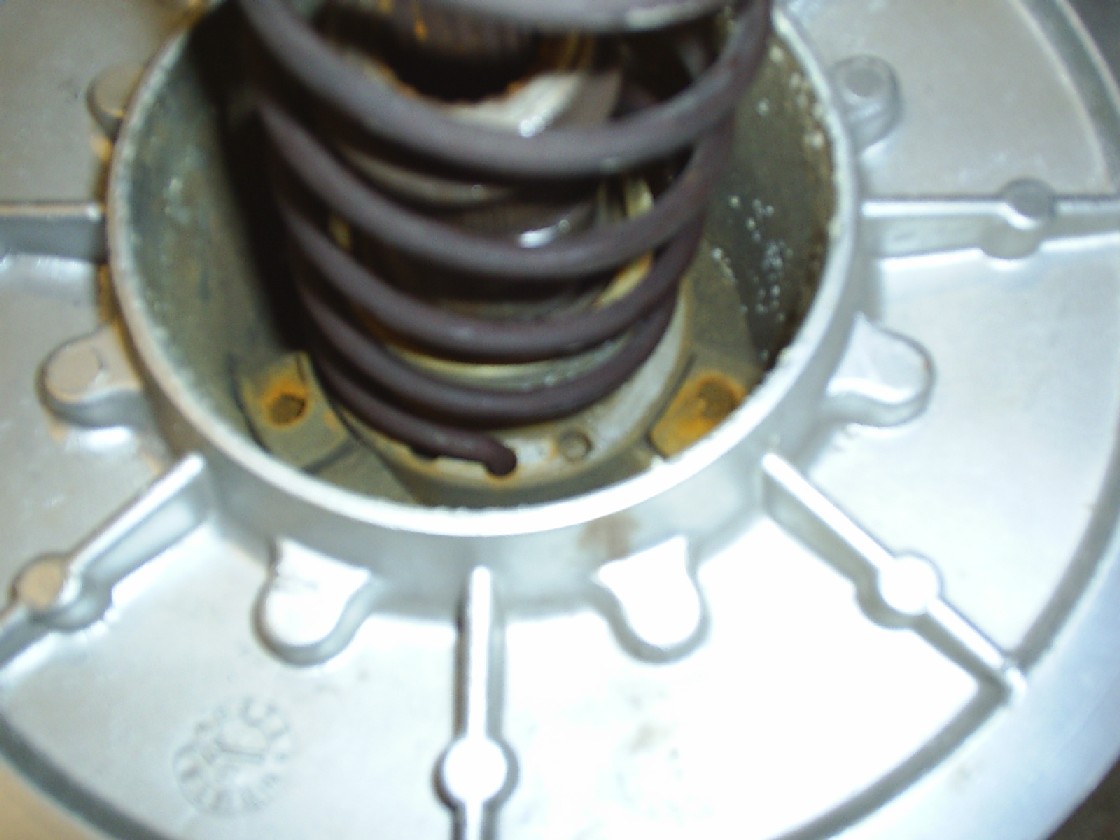
In the second pic I have inserted the spring. Notice the bad condition of the ramp pads, these should be replaced.
To insert the other prong in the cover you will need to drill a hole. The only difference between a standard clutch and the high torque version that i can see or that comet could tell me about was the spring and that hole, so lets get it drilled. This cover is one of the ones that come with the hole in them stock. If you look up a couple of pics for the inside view of the cover you will notice that the hole is drilled between two ramps (i.e. at the bottom of the ramp) It doesnt matter which of the 3 points you choose to put the hole. Drill it.
Now that the hole is drilled, put the other spring prong in that hole and it is ready to go back together. There is one challenge left. You have to twist the spring while pushing it down and put the snap ring back on. I have no idea how to do this without some nifty tool or a friend. TAKE NOTE: you cannot simply compress the spring, put the snap ring on, and expect good results.
How far to twist the spring? look at how each of the points at the end of the ramps will fall in between two ramp buttons. This is the wrong two buttons for it to fall between. It needs to be twisted such that the point falls between the next set of ramp buttons. I.E. you will need to twist it about 1/3 turn and hold it there while reassembling it.
I would suggest marking a line on the cover and one on the main clutch body that line up when you have twisted it far enough. This will help make sure you get it right. If the twist isn't enough it will perform similar to a regular clutch and you should repeat this part.
The actual spline you "grab" isn't important because the clutch will rotate until it catches the ramp pads on the ramp, so as long as the ramps are inserted between the correct ramp pads all will self calibrate.
This step is important, if this explanation is insufficient please feel free to email me at buggy@krisdillon.com and i will answer your question and update this page.
Once you have twisted it the correct amount, push the cover back down on the splines and reinstall the snap ring. You should be ready to try it out. This is what to expect.
The engine should rev a bit more during acceleration when under normal load. When loaded, i.e. pulling a trailer, steep hills, etc. it will rev quite a bit more, not to redline, but will stay in the power band.
If you have taller than stock tires or like me pull heavy loads this will make a significant difference in the amount of torque delivered to the rear wheels. Enjoy.
If you by chance run into trouble, or unearth new information, or have a suggestion please email me. I will perform this conversion for those of you who do not have time or desire to diy for a fee, currently about 50.00. You supply the parts and pay the shipping. My email address is buggy@krisdillon.com
PARTS
Spring - ezgo part number is 26304G01
Ramp pads - ezgo part number 24596G1 NOTE: This part number is for 2cycle cart, there may be a different part number for the pad needed on a 4 cycle cart. If someone can confirm this one way or the other let me know and i will post that info.
UPDATE: I have been informed that the 4cycle carts use ramp pad number 26479G01. I have not confirmed this myself.
These parts are current and should be easy to obtain from an ezgo dealer.
I would suggest www.buggiesunlimited.com or www.golfcarcatalog.com as a good source for parts, I have had good experiences with both. I have had several emails from people having trouble obtaining parts. In my experience, Emily or Jack at www.golfcarcatalog.com have never failed to figure out what I needed, nor made me wait long to get it.
If you have any trouble finding these parts please let me know asap so I can update this page.
UPDATE:
I have been told that changing or shimming the spring in the primary clutch will cause the clutch to engage at a higher rpm, thus providing more torque on takeoff. This should also cause the cart to be a bit jerky on takeoff. I have not tried this because I have not found a suitable spring, but should anyone else know how to get one for a reasonable cost I would very much like to know.
If you need a place to host pictures of your cart so you can post them on on buggy forums you do that here easily and free. Please rename your pictures to include your forum username so that I can send you a PM should there be a problem with your picture.
If you would like to see some pictures I took while building my cart click here. I haven't uploaded them all, but if you are interested in how I built my body, or need some 3pg reference pictures this may be helpful.